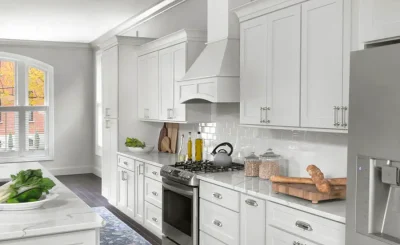
A great countertop deserves a sink and faucet setup that keeps mess down and momentum up. When these elements are planned together—not as afterthoughts—you get a kitchen that’s easier to clean, safer to use, and quicker from prep to plate. Here are seven integrations that deliver outsized gains in speed, hygiene, and everyday convenience.
1) Undermount Sinks with Flush or Negative Reveal
Undermounting maximizes counter space and makes wipe-downs effortless—crumbs and spills glide straight into the basin. Ask for a minimal (flush) or slight negative reveal so the counter edge overhangs the sink, hiding grime-prone seams while protecting the rim. Pair with a deep single-bowl design (9–10″) to submerge pans and prevent splash. The result: fewer drips, faster clean-up, and a sleek, uninterrupted surface line.
2) Integrated Drainboards and Landing Zones
If you hand-wash often or handle lots of produce, integrated drainboards—grooved or gently sloped into the counter—keep water where it belongs. Locate the drainboard on the primary prep side of the sink and add a 12–18″ “landing zone” of open counter for staging rinsed items. Stainless roll-up drying racks can span the basin for an instant drip station that tucks away when not in use.
3) Workstation (Ledge) Sinks That Multitask
A workstation sink adds built-in ledges for interchangeable accessories: cutting boards, colanders, drying racks, and knife blocks. Slide a board over the bowl to chop, push scraps straight into the drain, then swap to a colander insert to rinse greens—no extra steps, no puddles. For families or frequent entertainers, this integration effectively adds another prep station without expanding your footprint.
4) Pull-Down Sprayers with Dual-Mode Flow
Modern pull-down faucets with magnetic docking and ceramic cartridges are the unsung heroes of fast prep. Choose a sprayer head that toggles between aerated stream (for filling pots) and wide spray (for blasting out corners and rinsing produce). Look for a comfortable grip, smooth hose retraction, and a pivoting spout that clears tall stockpots. Bonus points for a pause button on the sprayer to control splatter when moving around the sink.
5) Hands-Free or Touch-Activated Controls
When your hands are covered in dough or raw chicken, hygienic activation matters. Touch or motion-activated faucets reduce cross-contamination and keep finishes cleaner, longer. For reliability, choose models with manual override and simple battery access (or hardwire the sensor to a concealed outlet). Pair with a temperature preset to keep the water comfortably warm for frequent rinses during prep marathons.
6) In-Counter Accessories: Soap, Air Gap, and Filtered Water
Consolidate daily-use accessories into the deck or countertop: a built-in soap or lotion dispenser eliminates clutter; an air gap (where required) maintains code compliance without awkward hardware later; and a dedicated filtered-water faucet keeps bottles filled without hogging the main spout. If you’re planning custom kitchen countertop installation, coordinate hole locations and diameters ahead of time so everything lines up cleanly and avoids structural weak points near seams.
7) Garbage Disposer + Air Switch + Sound Insulation
A quiet disposer with an in-counter air switch boosts safety and speed: wet hands stay away from electrical switches, and scraps disappear on demand. Choose a model with sound insulation and anti-vibration mounts to keep conversation-level noise in open kitchens. Add a baffle that reduces splash-back and a removable splash guard for easy cleaning. Position the switch within natural reach of your dominant prep hand.
Layout Tips That Multiply the Benefits
- Golden triangle, micro-edition: Align sink, trash/recycling pull-out, and primary prep space in a tight “micro-triangle.” You should be able to pivot or take one step between these three without reaching over wet areas.
- Set the right sink centerline: Center the basin on the prep zone you actually use (island vs. perimeter), not just the cabinet. If you have a dishwasher, center the sink slightly toward it to shave steps during cleanup.
- Mind clearances: Leave at least 3″ between faucet handle and backsplash to avoid knuckle-busting and water stains. Provide 18–24″ of uninterrupted counter on at least one side of the sink for safe knife and hot-pan staging.
- Plan for power: If you’re adding a workstation sink with accessories (blenders, frothers, espresso gear), integrate a pop-up outlet or concealed power strip under the counter near the basin for quick plug-ins.
- Choose easy-clean finishes: PVD-coated faucet finishes resist fingerprints and spots; micro-etched or brushed stainless basins conceal scuffs better than mirror-polish.
Maintenance Moves for Peak Performance
- Descale routinely: A monthly vinegar soak for sprayer heads and aerators keeps flow strong and spray patterns even.
- Refresh seals: Inspect caulk lines at sink edges and accessories every 6–12 months; re-seal at the first sign of cracking.
- Tighten once, enjoy for years: Periodically snug faucet mounting nuts and disposer brackets to prevent wobble, leaks, and noise.
Smart sink and faucet integrations turn your counter from a pretty surface into a high-efficiency workstation. Prioritize undermounting with the right reveal, add integrated drain and drying solutions, upgrade to a workstation basin for on-rail accessories, and finish with touch-activated control and in-counter add-ons. Tie it all together with a quiet, safe disposer and thoughtful placement of trash and power. Build these choices into the plan before templating day, and your prep zone will run cleaner, faster, and calmer—every single meal.


